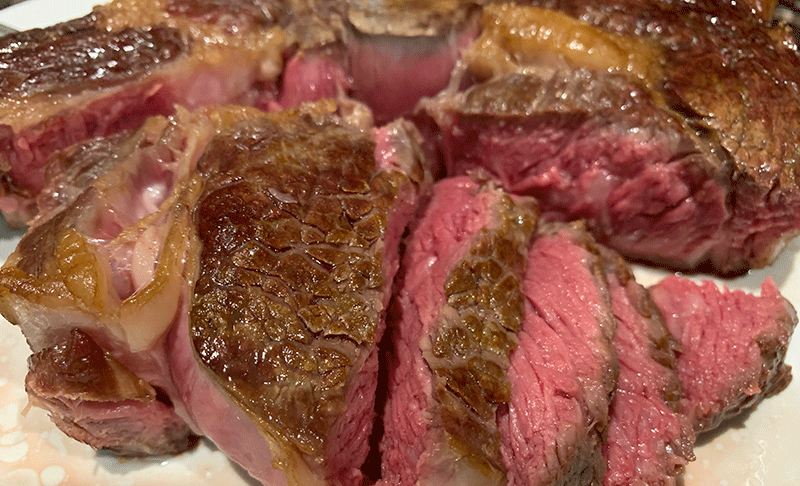
Most of us who enjoy a nice steak now and again have looked at that thick-cut, pristine ribeye sitting in all its glory on the counter and debated what cooking method might yield the very best tasting outcome on that given day.
Should I fire the grill (two zones of course), break out the sous vide circulator and cast iron, or sear it on the stove top?
Thin-cut steaks, and for my purposes today I’m talking about anything cut an inch or less thick, are a pretty easy cook (relatively speaking); they cook fairly quickly regardless of method and in fact pan-sear quite easily.
The thicker-cut steak(s) pose an interesting challenge for the carnivore; sometimes you nail it, but just as often your masterpiece is too rare or even worse, overdone, dry, and chewy.
We’ve shared before that we’re fans of sous vide to cook thick-cut proteins, using BPA-free plastic immersion bags of course, followed by a quick sear in cast-iron over high heat. We’ve been using that technique routinely now for a couple of years, though my son Jake in Montana recently challenged me to re-visit an old technique – the reverse sear.
We’ve used the reverse sear method to cook bone-in rib roasts for years now (what a great holiday treat), and have been cooking thick-cut, bone-in ribeyes this way for a few months (my favorite local market calls this particular cut pictured a cowboy ribeye – the rib bone is left in but it’s not as long as the over-marketed tomahawk steak). I have to admit, the results are amazing, and consistently produce the best steak the home cook can easily prepare at home.
The most critical caveat is that this method works best for thicker cuts, at least 1 and 1/2 inches and even better at 2 inches (or more).
There are several advantages to using the reverse sear method. Low and slow heat prevents overcooking and offers more control, and the warm oven dries the surface of your steak allowing for a better and more effective sear at the end. The reverse sear method is perfect for dialing in a medium-rare or medium steak, preserving more tender pink meat with smaller gray cooked (or overcooked) edges that any other technique.
Reverse sear shines with thicker cuts, allows for creation of a prize-winning crust when you do sear – use preheated cast iron and be creative with your fat (try ghee or bacon drippings!). And the fond and drippings in the pan can be used to whip up a tasty pan-sauce as well. And by the way, while not every one happens to have a sous vide circulator on the shelf, most of us have an oven handy.
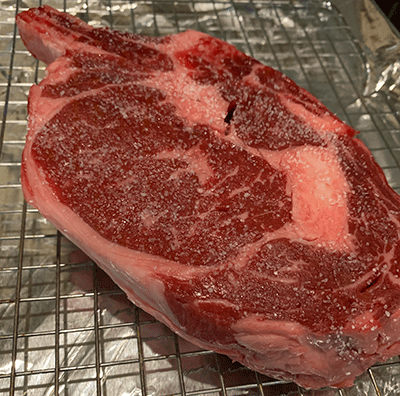 The process really couldn’t be easier. Preheat the oven to 275 F and line a baking sheet with foil, then place a wire rack over the foil (allows hot air to circulate all around the steak).
Pat the surface of the steak(s) dry and liberally coat with salt and pepper, then place on the wire rack and slide into the oven.
Advice from steak experts varies as to when you need to start checking the internal temperature of the steak; for the steaks I’m routinely sourcing for our kitchen, I typically give them 20 minutes in the oven at 275F before starting to check internal temperatures with an accurate meat thermometer.
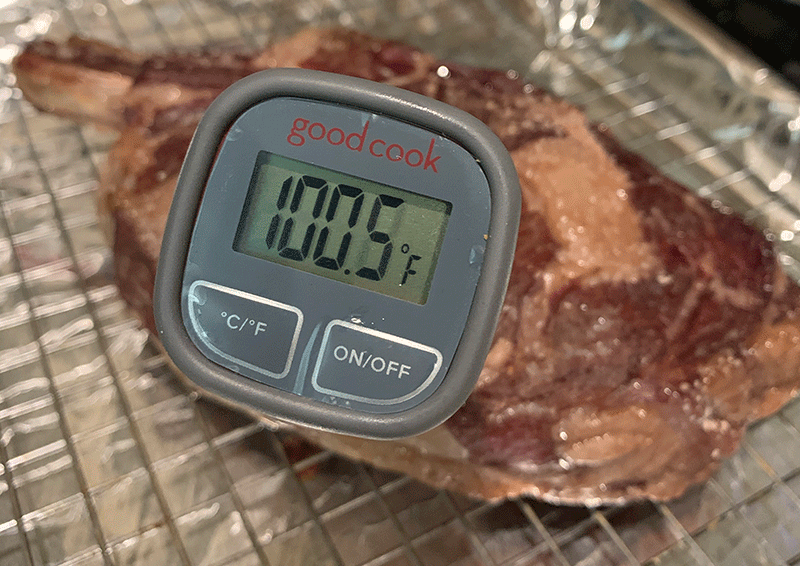
While it may sound like heresy, for the oven part of this process, you’re looking for temps of 90-95F for medium-rare and 100-105F for medium. Think about it, you’re not cooking the steak completely in the oven, and it’ll finish cooking during the sear to follow.
Over high heat on the stove top, and using a high smoke point oil (avocado oil, ghee, etc), sear the steaks for 2-3 minutes per side until the desired internal temp is reached: 120-122F for medium-rare and 126-128F for medium. We like to quickly sear the edges as well.
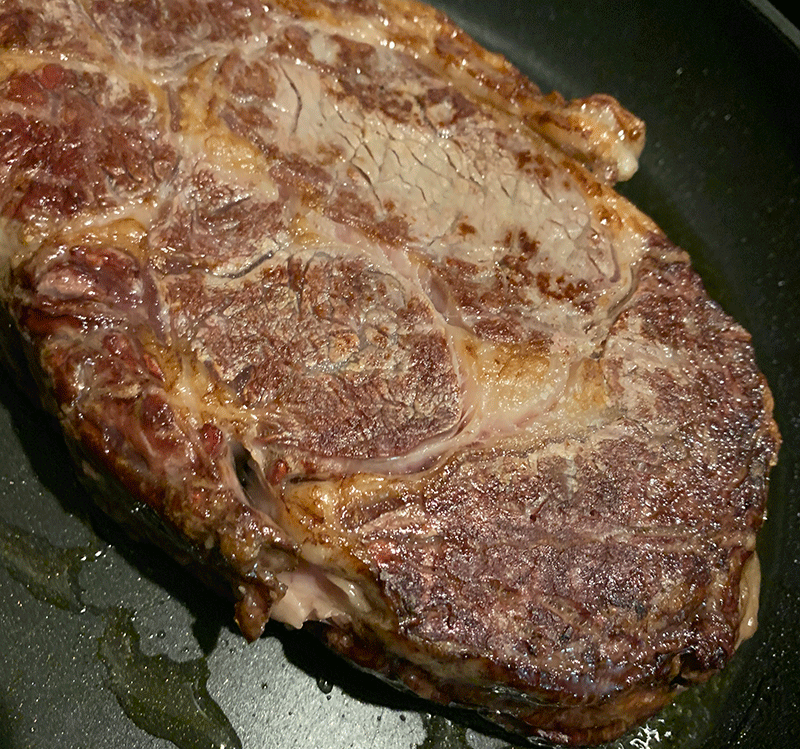
It’s vital that you rest the steak(s) for 10 minutes or so after searing to allow carryover cooking to finish these proteins perfectly (internal temps will rise another 5-10 degrees).
If you’ve not reverse seared steaks yet, give this method a spin – you’ll come back to it time and time again.
Enjoy.
